Saturday, December 10, 2022

Running Cockpit inside ALP

(quoted from my other blog at since a new OS might be interesting for many and this is published in separate planets)

ALP - The Adaptable Linux Platform – is a new operating system from SUSE to run containerized and virtualized workloads. It is in early prototype phase, but the development is done completely openly so it’s easy to jump in to try it.

For this trying out, I used the latest encrypted build – as of the writing, 22.1 – from ALP images. I imported it in virt-manager as a Generic Linux 2022 image, using UEFI instead of BIOS, added a TPM device (which I’m interested in otherwise) and referring to an Ignition JSON file in the XML config in virt-manager.

The Ignition part is pretty much fully thanks to Paolo Stivanin who studied the secrets of it before me. But here it goes - and this is required for password login in Cockpit to work in addition to SSH key based login to the VM from host - first, create config.ign file:

{
  "ignition": { "version": "3.3.0" },
  "passwd": {
    "users": [
      {
        "name": "root",
        "passwordHash": "YOURHASH",
        "sshAuthorizedKeys": [
          "ssh-... YOURKEY"
        ]
      }
    ]
  },
  "systemd": {
    "units": [{
      "name": "sshd.service",
      "enabled": true
    }]
  },
  "storage": {
    "files": [
      {
        "overwrite": true,
        "path": "/etc/ssh/sshd_config.d/20-enable-passwords.conf",
        "contents": {
          "source": "data:,PasswordAuthentication%20yes%0APermitRootLogin%20yes%0A"
        },
        "mode": 420
      }
    ]
  }
}

…where password SHA512 hash can be obtained using openssl passwd -6 and the ssh key is your public ssh key.

That file is put to eg /tmp and referred in the virt-manager’s XML like follows:

  <sysinfo type="fwcfg">
    <entry name="opt/com.coreos/config" file="/tmp/config.ign"/>
  </sysinfo>

Now we can boot up the VM and ssh in - or you could log in directly too but it’s easier to copy-paste commands when using ssh.

Inside the VM, we can follow the ALP documentation to install and start Cockpit:

podman container runlabel install registry.opensuse.org/suse/alp/workloads/tumbleweed_containerfiles/suse/alp/workloads/cockpit-ws:latest
podman container runlabel --name cockpit-ws run registry.opensuse.org/suse/alp/workloads/tumbleweed_containerfiles/suse/alp/workloads/cockpit-ws:latest
systemctl enable --now cockpit.service

Check your host’s IP address with ip -a, and open IP:9090 in your host’s browser:

Cockpit login screen

Login with root / your password and you shall get the front page:

Cockpit front page

…and many other pages where you can manage your ALP deployment via browser:

Cockpit podman page

All in all, ALP is in early phases but I’m really happy there’s up-to-date documentation provided and people can start experimenting it whenever they want. The images from the linked directory should be fairly good, and test automation with openQA has been started upon as well.

You can try out the other example workloads that are available just as well.
Wednesday, January 26, 2022

Unboxing Dell XPS 13 - openSUSE Tumbleweed alongside preinstalled Ubuntu

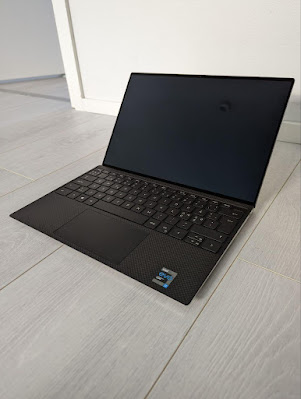
A look at the 2021 model of Dell XPS 13 - available with Linux pre-installed

I received a new laptop for work - a Dell XPS 13. Dell has been long famous for offering certain models with pre-installed Linux as a supported option, and opting for those is nice for moving some euros/dollars from certain PC desktop OS monopoly towards Linux desktop engineering costs. Notably Lenovo also offers Ubuntu and Fedora options on many models these days (like Carbon X1 and P15 Gen 2).
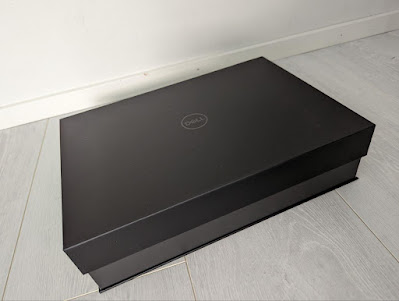
black box

opened box

accessories and a leaflet about Linux support

laptop lifted from the box, closed

laptop with lid open

Ubuntu running

openSUSE runnin
 
Obviously a smooth, ready-to-rock Ubuntu installation is nice for most people already, but I need openSUSE, so after checking everything is fine with Ubuntu, I continued to install openSUSE Tumbleweed as a dual boot option. As I’m a funny little tinkerer, I obviously went with some special things. I wanted:
  • Ubuntu to remain as the reference supported OS on a small(ish) partition, useful to compare to if trying out new development versions of software on openSUSE and finding oddities.
  • openSUSE as the OS consuming most of the space.
  • LUKS encryption for openSUSE without LVM.
  • ext4’s new fancy ‘fast_commit’ feature in use during filesystem creation.
  • As a result of all that, I ended up juggling back and forth installation screens a couple of times (even more than shown below, and also because I forgot I wanted to use encryption the first time around).
First boots to pre-installed Ubuntu and installation of openSUSE Tumbleweed as the dual-boot option: 
 
(if the embedded video is not shown, use a direct link)
 
Some notes from the openSUSE installation:
  • openSUSE installer’s partition editor apparently does not support resizing or automatically installing side-by-side another Linux distribution, so I did part of the setup completely on my own.
  • Installation package download hanged a couple of times, only passed when I entered a mirror manually. On my TW I’ve also noticed download problems recently, there might be a problem with some mirror I need to escalate.
  • The installer doesn’t very clearly show encryption status of the target installation - it took me a couple of attempts before I even noticed the small “encrypted” column and icon (well, very small, see below), which also did not spell out the device mapper name but only the main partition name. In the end it was going to do the right thing right away and use my pre-created encrypted target partition as I wanted, but it could be a better UX. Then again I was doing my very own tweaks anyway.
  • Let’s not go to the details why I’m so old-fashioned and use ext4 :)
  • openSUSE’s installer does not work fine with HiDPI screen. Funnily the tty consoles seem to be fine and with a big font.
  • At the end of the video I install the two GNOME extensions I can’t live without, Dash to Dock and Sound Input & Output Device Chooser.