Saturday, December 10, 2022

Running Cockpit inside ALP

(quoted from my other blog at since a new OS might be interesting for many and this is published in separate planets)

ALP - The Adaptable Linux Platform – is a new operating system from SUSE to run containerized and virtualized workloads. It is in early prototype phase, but the development is done completely openly so it’s easy to jump in to try it.

For this trying out, I used the latest encrypted build – as of the writing, 22.1 – from ALP images. I imported it in virt-manager as a Generic Linux 2022 image, using UEFI instead of BIOS, added a TPM device (which I’m interested in otherwise) and referring to an Ignition JSON file in the XML config in virt-manager.

The Ignition part is pretty much fully thanks to Paolo Stivanin who studied the secrets of it before me. But here it goes - and this is required for password login in Cockpit to work in addition to SSH key based login to the VM from host - first, create config.ign file:

{
  "ignition": { "version": "3.3.0" },
  "passwd": {
    "users": [
      {
        "name": "root",
        "passwordHash": "YOURHASH",
        "sshAuthorizedKeys": [
          "ssh-... YOURKEY"
        ]
      }
    ]
  },
  "systemd": {
    "units": [{
      "name": "sshd.service",
      "enabled": true
    }]
  },
  "storage": {
    "files": [
      {
        "overwrite": true,
        "path": "/etc/ssh/sshd_config.d/20-enable-passwords.conf",
        "contents": {
          "source": "data:,PasswordAuthentication%20yes%0APermitRootLogin%20yes%0A"
        },
        "mode": 420
      }
    ]
  }
}

…where password SHA512 hash can be obtained using openssl passwd -6 and the ssh key is your public ssh key.

That file is put to eg /tmp and referred in the virt-manager’s XML like follows:

  <sysinfo type="fwcfg">
    <entry name="opt/com.coreos/config" file="/tmp/config.ign"/>
  </sysinfo>

Now we can boot up the VM and ssh in - or you could log in directly too but it’s easier to copy-paste commands when using ssh.

Inside the VM, we can follow the ALP documentation to install and start Cockpit:

podman container runlabel install registry.opensuse.org/suse/alp/workloads/tumbleweed_containerfiles/suse/alp/workloads/cockpit-ws:latest
podman container runlabel --name cockpit-ws run registry.opensuse.org/suse/alp/workloads/tumbleweed_containerfiles/suse/alp/workloads/cockpit-ws:latest
systemctl enable --now cockpit.service

Check your host’s IP address with ip -a, and open IP:9090 in your host’s browser:

Cockpit login screen

Login with root / your password and you shall get the front page:

Cockpit front page

…and many other pages where you can manage your ALP deployment via browser:

Cockpit podman page

All in all, ALP is in early phases but I’m really happy there’s up-to-date documentation provided and people can start experimenting it whenever they want. The images from the linked directory should be fairly good, and test automation with openQA has been started upon as well.

You can try out the other example workloads that are available just as well.
Wednesday, January 26, 2022

Unboxing Dell XPS 13 - openSUSE Tumbleweed alongside preinstalled Ubuntu

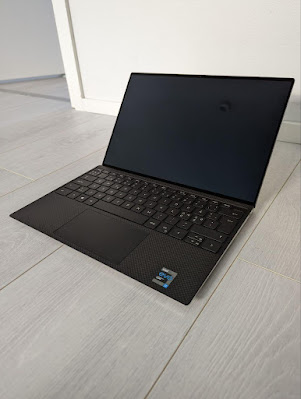
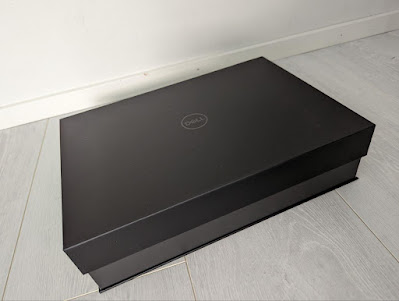
A look at the 2021 model of Dell XPS 13 - available with Linux pre-installed

I received a new laptop for work - a Dell XPS 13. Dell has been long famous for offering certain models with pre-installed Linux as a supported option, and opting for those is nice for moving some euros/dollars from certain PC desktop OS monopoly towards Linux desktop engineering costs. Notably Lenovo also offers Ubuntu and Fedora options on many models these days (like Carbon X1 and P15 Gen 2).
black box

opened box

accessories and a leaflet about Linux support

laptop lifted from the box, closed

laptop with lid open

Ubuntu running

openSUSE runnin
 
Obviously a smooth, ready-to-rock Ubuntu installation is nice for most people already, but I need openSUSE, so after checking everything is fine with Ubuntu, I continued to install openSUSE Tumbleweed as a dual boot option. As I’m a funny little tinkerer, I obviously went with some special things. I wanted:
  • Ubuntu to remain as the reference supported OS on a small(ish) partition, useful to compare to if trying out new development versions of software on openSUSE and finding oddities.
  • openSUSE as the OS consuming most of the space.
  • LUKS encryption for openSUSE without LVM.
  • ext4’s new fancy ‘fast_commit’ feature in use during filesystem creation.
  • As a result of all that, I ended up juggling back and forth installation screens a couple of times (even more than shown below, and also because I forgot I wanted to use encryption the first time around).
First boots to pre-installed Ubuntu and installation of openSUSE Tumbleweed as the dual-boot option: 
 
(if the embedded video is not shown, use a direct link)
 
Some notes from the openSUSE installation:
  • openSUSE installer’s partition editor apparently does not support resizing or automatically installing side-by-side another Linux distribution, so I did part of the setup completely on my own.
  • Installation package download hanged a couple of times, only passed when I entered a mirror manually. On my TW I’ve also noticed download problems recently, there might be a problem with some mirror I need to escalate.
  • The installer doesn’t very clearly show encryption status of the target installation - it took me a couple of attempts before I even noticed the small “encrypted” column and icon (well, very small, see below), which also did not spell out the device mapper name but only the main partition name. In the end it was going to do the right thing right away and use my pre-created encrypted target partition as I wanted, but it could be a better UX. Then again I was doing my very own tweaks anyway.
  • Let’s not go to the details why I’m so old-fashioned and use ext4 :)
  • openSUSE’s installer does not work fine with HiDPI screen. Funnily the tty consoles seem to be fine and with a big font.
  • At the end of the video I install the two GNOME extensions I can’t live without, Dash to Dock and Sound Input & Output Device Chooser.

Tuesday, December 14, 2021

Working and warming up cats

How to disable internal keyboard/touchpad when a cat arrives

I’m using an external keyboard (1) and mouse (2), but the laptop lid is usually still open for better cooling. That means the internal keyboard (3) and touchpad (4) – made of comfortable materials – are open to be used by a cat searching for warmth (7), in the obvious “every time” case that a normal non-heated nest (6) is not enough.

The problem is, everything goes chaotic at that point in the default configuration. The solution is to have quick shortcuts in my Dash to Dock (8) to both disable (10) and enable (9) keyboard and touchpad at a very rapid pace.

It is to be noted that I’m not disabling the touch screen (5) by default, because most of the time the cat is not leaning on it – there is also the added benefit that if one forgets about the internal keyboard and touchpad disabling and detaches the laptop from the USB-C monitor (11), there’s the possibility of using the touch screen and on-screen keyboard to type in the password and tap on the keyboard/touchpad enabling shortcut button again. If also touch screen was disabled, the only way would be to go back to an external keyboard or reboot.

So here are the scripts. First, the disabling script (pardon my copy-paste use of certain string manipulation tools):

dconf write /org/gnome/desktop/peripherals/touchpad/send-events "'disabled'"
sudo killall evtest
sudo evtest --grab $(sudo libinput list-devices | grep -A 1 "AT Translated Set 2 keyboard" | tail -n 1 | sed 's/.*\/dev/\/dev/') &
sudo evtest --grab $(sudo libinput list-devices | grep -A 1 "Dell WMI" | tail -n 1 | sed 's/.*\/dev/\/dev/') &
sudo evtest --grab $(sudo libinput list-devices | grep -A 1 "Power" | grep Kernel | tail -n 1 | sed 's/.*\/dev/\/dev/') &
sudo evtest --grab $(sudo libinput list-devices | grep -A 1 "Power" | grep Kernel | head -n 1 | sed 's/.*\/dev/\/dev/') &
sudo evtest --grab $(sudo libinput list-devices | grep -A 1 "Sleep" | grep Kernel | tail -n 1 | sed 's/.*\/dev/\/dev/') &
sudo evtest --grab $(sudo libinput list-devices | grep -A 1 "HID" | grep Kernel | head -n 1 | sed 's/.*\/dev/\/dev/') &
sudo evtest --grab $(sudo libinput list-devices | grep -A 1 "HID" | tail -n 1 | sed 's/.*\/dev/\/dev/') &
#sudo evtest --grab $(sudo libinput list-devices | grep -A 1 "ELAN" | tail -n 1 | sed 's/.*\/dev/\/dev/') # Touch screen

And the associated ~/.local/share/applications/disable-internal-input.desktop:

[Desktop Entry]
Version=1.0
Name=Disable internal input
GenericName=Disable internal input
Exec=/bin/bash -c /home/timo/Asiakirjat/helpers/disable-internal-input.sh
Icon=yast-keyboard
Type=Application
Terminal=false
Categories=Utility;Development;

Here’s the enabling script:

dconf write /org/gnome/desktop/peripherals/touchpad/send-events "'enabled'"
sudo killall evtest

and the desktop file:

[Desktop Entry]
Version=1.0
Name=Enable internal input
GenericName=Enable internal input
Exec=/bin/bash -c /home/timo/Asiakirjat/helpers/enable-internal-input.sh
Icon=/home/timo/.local/share/icons/hicolor/scalable/apps/yast-keyboard-enable.png
Type=Application
Terminal=false
Categories=Utility;Development;

With these, if I sense a cat or am just proactive enough, I press Super+9. If I’m about to detach my laptop from the monitor, I press Super+8. If I forget the latter (usually this is the case) and haven’t yet locked the screen, I just tap the enabling icon on the touch screen.

Wednesday, March 31, 2021

MotionPhoto / MicroVideo File Formats on Pixel Phones

Google Pixel phones support what they call ”Motion Photo” which is essentially a photo with a short video clip attached to it. They are quite nice since they bring the moment alive, especially as the capturing of the video starts a small moment before the shutter button is pressed. For most viewing programs they simply show as static JPEG photos, but there is more to the files.

I’d really love proper Shotwell support for these file formats, so I posted a longish explanation with many of the details in this blog post to a ticket there too. Examples of the newer format are linked there too.

Info posted to Shotwell ticket

There are actually two different formats, an old one that is already obsolete, and a newer current format. The older ones are those that your Pixel phone recorded as ”MVIMG_[datetime].jpg", and they have the following meta-data:

Xmp.GCamera.MicroVideo                       XmpText     1  1
Xmp.GCamera.MicroVideoVersion                XmpText     1  1
Xmp.GCamera.MicroVideoOffset                 XmpText     7  4022143
Xmp.GCamera.MicroVideoPresentationTimestampUs XmpText     7  1331607

The offset is actually from the end of the file, so one needs to calculate accordingly. But it is exact otherwise, so one simply extract a file with that meta-data information:

#!/bin/bash
#
# Extracts the microvideo from a MVIMG_*.jpg file

# The offset is from the ending of the file, so calculate accordingly
offset=$(exiv2 -p X "$1" | grep MicroVideoOffset | sed 's/.*\"\(.*\)"/\1/')
filesize=$(du --apparent-size --block=1 "$1" | sed 's/^\([0-9]*\).*/\1/')
extractposition=$(expr $filesize - $offset)
echo offset: $offset
echo filesize: $filesize
echo extractposition=$extractposition
dd if="$1" skip=1 bs=$extractposition of="$(basename -s .jpg $1).mp4"

The newer format is recorded in filenames called ”PXL_[datetime].MP.jpg”, and they have a _lot_ of additional metadata:

Xmp.GCamera.MotionPhoto                      XmpText     1  1
Xmp.GCamera.MotionPhotoVersion               XmpText     1  1
Xmp.GCamera.MotionPhotoPresentationTimestampUs XmpText     6  233320
Xmp.xmpNote.HasExtendedXMP                   XmpText    32  E1F7505D2DD64EA6948D2047449F0FFA
Xmp.Container.Directory                      XmpText     0  type="Seq"
Xmp.Container.Directory[1]                   XmpText     0  type="Struct"
Xmp.Container.Directory[1]/Container:Item    XmpText     0  type="Struct"
Xmp.Container.Directory[1]/Container:Item/Item:Mime XmpText    10  image/jpeg
Xmp.Container.Directory[1]/Container:Item/Item:Semantic XmpText     7  Primary
Xmp.Container.Directory[1]/Container:Item/Item:Length XmpText     1  0
Xmp.Container.Directory[1]/Container:Item/Item:Padding XmpText     1  0
Xmp.Container.Directory[2]                   XmpText     0  type="Struct"
Xmp.Container.Directory[2]/Container:Item    XmpText     0  type="Struct"
Xmp.Container.Directory[2]/Container:Item/Item:Mime XmpText     9  video/mp4
Xmp.Container.Directory[2]/Container:Item/Item:Semantic XmpText    11  MotionPhoto
Xmp.Container.Directory[2]/Container:Item/Item:Length XmpText     7  1679555
Xmp.Container.Directory[2]/Container:Item/Item:Padding XmpText     1  0

Sounds like fun and lots of information. However I didn’t see why the “length” in first item is 0 and I didn’t see how to use the latter Length info. But I can use the mp4 headers to extract it:

#!/bin/bash
#
# Extracts the motion part of a MotionPhoto file PXL_*.MP.mp4

extractposition=$(grep --binary --byte-offset --only-matching --text \
-P "\x00\x00\x00\x18\x66\x74\x79\x70\x6d\x70\x34\x32" $1 | sed 's/^\([0-9]*\).*/\1/') dd if="$1" skip=1 bs=$extractposition of="$(basename -s .jpg $1).mp4"

UPDATE: I wrote most of this blog post earlier. When now actually getting to publishing it a week later, I see the obvious ie the ”Length” is again simply the offset from the end of the file so one could do the same less brute force approach as for MVIMG. I’ll leave the above as is however for the ❤️ of binary grepping.

UPDATE 08/2021: Here's the script to extract also MP without brute force:

#!/bin/bash
#
# Extracts the motion part of a MotionPhoto file PXL_*.MP.mp4

set -e
# Brute force
#extractposition=$(grep --binary --byte-offset --only-matching --text -P "\x00\x00\x00\x18\x66\x74\x79\x70\x6d\x70\x34\x32" $1 | sed 's/^\([0-9]*\).*/\1/')

# Metadata
offset=$(exiv2 -p x "$1" | grep Length | tail -n 1 |  rev | cut -d ' ' -f 1 | rev)
echo offset: ${offset}
re='^[0-9]+$'
if ! [[ $offset =~ $re ]] ; then
   echo "offset not found"
   exit 1
fi
filesize=$(du --apparent-size --block=1 "$1" | sed 's/^\([0-9]*\).*/\1/')

echo filesize: $filesize
extractposition=$(expr $filesize - $offset)
echo extractposition=$extractposition

dd if="$1" skip=1 bs=$extractposition of="$(basename -s .jpg $1).mp4"

(cross-posted to my other blog)

Tuesday, August 28, 2018

Repeated prompts for SSH key passphrase after upgrading to Ubuntu 18.04 LTS?

This was a tricky one (for me, anyway) so posting a note to help others.

The problem was that after upgrading to Ubuntu 18.04 LTS from 16.04 LTS, I had trouble with my SSH agent. I was always being asked for the passphrase again and again, even if I had just used the key. This wouldn't have been a showstopper otherwise, but it made using virt-manager over SSH impossible because it was asking for the passphrase tens of times.

I didn't find anything on the web, and I didn't find any legacy software or obsolete configs to remove to fix the problem. I only got a hint when I tried ssh-add -l, with which I got the error message ”error fetching identities: Invalid key length”. This lead me on the right track, since after a while I started suspecting my old keys in .ssh that I hadn't used for years. And right on: after I removed one id_dsa (!) key and one old RSA key from .ssh directory (with GNOME's Keyring app to be exact), ssh-add -l started working and at the same time the familiar SSH agent behavior resumed and I was able to use my remote VMs fine too!

Hope this helps.

ps. While at the topic, remember to upgrade your private keys' internal format to the new OpenSSH format from the ”worse than plaintext” format with the -o option: blog post – tl; dr; ssh-keygen -p -o -f id_rsa and retype your passphrase.

Monday, May 07, 2018

Converting an existing installation to LUKS using luksipc - 2018 notes

Time for a laptop upgrade. Encryption was still not the default for the new Dell XPS 13 Developer Edition (9370) that shipped with Ubuntu 16.04 LTS, so I followed my own notes from 3 years ago together with the official documentation to convert the unencrypted OEM Ubuntu installation to LUKS during the weekend. This only took under 1h altogether.

On this new laptop model, EFI boot was already in use, Secure Boot was enabled and the SSD had GPT from the beginning. The only thing I wanted to change thus was the / to be encrypted.

Some notes for 2018 to clarify what is needed and what is not needed:
  • Before luksipc, remember to resize existing partitions to have 10 MB of free space at the end of the / partition, and also create a new partition of eg 1 GB size partition for /boot.
  • To get the code and compile luksipc on Ubuntu 16.04.4 LTS live USB, just apt install git build-essential is needed. cryptsetup package is already installed.
  • After luksipc finishes and you've added your own passphrase and removed the initial key (slot 0), it's useful to cryptsetup luksOpen it and mount it still under the live session - however, when using ext4, the mounting fails due to a size mismatch in ext4 metadata! This is simple to correct: sudo resize2fs /dev/mapper/root. Nothing else is needed.
  • I mounted both the newly encrypted volume (to /mnt) and the new /boot volume (to /mnt2 which I created), and moved /boot/* from the former to latter.
  • I edited /etc/fstab of the encrypted volume to add the /boot partition
  • Mounted as following in /mnt:
    • mount -o bind /dev dev
    • mount -o bind /sys sys
    • mount -t proc proc proc
  • Then:
    • chroot /mnt
    • mount -a # (to mount /boot and /boot/efi)
    • Edited files /etc/crypttab (added one line: root UUID none luks) and /etc/grub/default (I copied over my overkill configuration that specifies all of cryptopts and cryptdevice some of which may be obsolete, but at least one of them and root=/dev/mapper/root is probably needed).
    • Ran grub-install ; update-grub ; mkinitramfs -k all -c (notably no other parameters were needed)
    • Rebooted.
  • What I did not need to do:
    • Modify anything in /etc/initramfs-tools.
If the passphrase input shows on your next boot, but your correct passphrase isn't accepted, it's likely that the initramfs wasn't properly updated yet. I first forgot to run the mkinitramfs command and faced this.

Friday, November 20, 2015

Converting an existing installation to LUKS using luksipc

This is a burst of notes that I wrote in an e-mail in June when asked about it, and I'm not going to have any better steps since I don't remember even that amount as back then. I figured it's better to have it out than not.

So... if you want to use LUKS In-Place Conversion Tool, the notes below on converting a shipped-with-Ubuntu Dell XPS 13 Developer Edition (2015 Intel Broadwell model) may help you. There were a couple of small learnings to be had...
 
The page http://www.johannes-bauer.com/linux/luksipc/ itself is good and without errors, although funnily uses reiserfs as an example. It was only a bit unclear why I did save the initial_keyfile.bin since it was then removed in the next step (I guess it's for the case you want to have a recovery file hidden somewhere in case you forget the passphrase).

For using the tool I booted from a 14.04.2 LTS USB live image and operated there, including downloading and compiling luksipc in the live session. The exact reason of resizing before luksipc was a bit unclear to me at first so I simply indeed resized the main rootfs partition and left unallocated space in the partition table.


Then finally I ran ./luksipc -d /dev/sda4 etc.


I realized I want /boot to be on an unencrypted partition to be able to load the kernel + initrd from grub before entering into LUKS unlocking. I couldn't resize the luks partition anymore since it was encrypted... So I resized what I think was the empty small DIAGS partition (maybe used for some system diagnostic or something, I don't know), or possibly the next one that is the actual recovery partition one can reinstall the pre-installed Ubuntu from. And naturally I had some problems because it seems vfatresize tool didn't do what I wanted it to do and gparted simply crashed when I tried to use it first to do the same. Anyway, when done with getting some extra free space somewhere, I used the remaining 350MB for /boot where I copied the rootfs's /boot contents to.

After adding the passphrase in luks I had everything encrypted etc and decryptable, but obviously I could only access it from a live session by manual cryptsetup luksOpen + mount /dev/mapper/myroot commands. I needed to configure GRUB, and I needed to do it with the grub-efi-amd64 which was a bit unfamiliar to me. There's also grub-efi-amd64-signed I have installed now but I'm not sure if it was required for the configuration. Secure boot is not enabled by default in BIOS so maybe it isn't needed.


I did GRUB installation – I think inside rootfs chroot where I also mounted /dev/sda6 as /boot (inside the rootfs chroot), ie mounted dev, sys with -o bind to under the chroot (from outside chroot) and mount -t proc proc proc too. I did a lot of trial and effort so I surely also tried from outside the chroot, in the live session, using some parameters to point to the mounted rootfs's directories...


I needed to definitely install cryptsetup etc inside the encrypted rootfs with apt, and I remember debugging for some time if they went to the initrd correctly after I executed mkinitramfs/update-initramfs inside the chroot.


At the end I had grub asking for the password correctly at bootup. Obviously I had edited the rootfs's /etc/fstab to include the new /boot partition, I changed / to be "UUID=/dev/mapper/myroot /     ext4    errors=remount-ro 0       ", kept /boot/efi as coming from the /dev/sda1 and so on. I had also added "myroot /dev/sda4 none luks" to /etc/crypttab. I seem to also have GRUB_CMDLINE_LINUX="cryptdevice=/dev/sda4:myroot root=/dev/mapper/myroot" in /etc/default/grub.

The only thing I did save from the live session was the original partition table if I want to revert.


So the original was:

Found valid GPT with protective MBR; using GPT.
Disk /dev/sda: 500118192 sectors, 238.5 GiB
Logical sector size: 512 bytes
...
First usable sector is 34, last usable sector is 500118158
Partitions will be aligned on 2048-sector boundaries
Total free space is 6765 sectors (3.3 MiB)
 
Number  Start (sector)    End (sector)  Size       Code  Name
1            2048         1026047   500.0 MiB   EF00  EFI system partition
2         1026048         1107967   40.0 MiB    FFFF  Basic data partition
3         1107968         7399423   3.0 GiB     0700  Basic data partition
4         7399424       467013631   219.2 GiB   8300
5       467017728       500117503   15.8 GiB    8200

And I now have:


Number  Start (sector)    End (sector)  Size       Code  Name

1            2048         1026047   500.0 MiB   EF00  EFI system partition
2         1026048         1107967   40.0 MiB    FFFF  Basic data partition
3         1832960         7399423   2.7 GiB     0700  Basic data partition
4         7399424       467013631   219.2 GiB   8300
5       467017728       500117503   15.8 GiB    8200
6         1107968         1832959   354.0 MiB   8300

So it seems I did not edit DIAGS (and it was also originally just 40MB) but did something with the recovery partition while preserving its contents. It's a FAT partition so maybe I was able to somehow resize it after all.


The 16GB partition is the default swap partition. I did not encrypt it at least yet, I tend to not run into swap anyway ever in my normal use with the 8GB RAM.


If you go this route, good luck! :D

Monday, June 08, 2015

Quick Look: Dell XPS 13 Developer Edition (2015) with Ubuntu 14.04 LTS

I recently obtained the newest Dell's Ubuntu developer offering, XPS 13 (2015, model 9343). I opted in for FullHD non-touch display, mostly because of better battery life, the actual no need for higher resolution, and matte screen which is great outside. Touch would have been "nice-to-have", but in my work I don't really need it.

The other specifications include i7-5600U CPU, 8GB RAM, 256GB SSD [edit: lshw], and of course Ubuntu 14.04 LTS pre-installed as OEM specific installation. It was not possible to directly order it from Dell site, as Finland is reportedly not online market for Dell... The wholesale company however managed to get two models on their lists and so it's now possible to order via retailers. [edit: here are some country specific direct web order links however US, DE, FR, SE, NL]

In this blog post I give a quick look on how I started up using it, and do a few observations on the pre-installed Ubuntu included. I personally was interested in using the pre-installed Ubuntu like a non-Debian/Ubuntu developer would use it, but Dell has also provided instructions for Ubuntu 15.04, Debian 7.0 and Debian 8.0 advanced users among else. Even if not using the pre-installed Ubuntu, the benefit from buying an Ubuntu laptop is obviously smaller cost and on the other hand contributing to free software (by paying for the hardware enablement engineering done by or purchased by Dell).

Unboxing

The Black Box. (and white cat)

Opened box.


First time lid opened, no dust here yet!
First time boot up, transitioning from the boot logo to a first time Ubuntu video.
A small clip from the end of the welcoming video.
First time setup. Language, Dell EULA, connecting to WiFi, location, keyboard, user+password.
Creating recovery media. I opted not to do this as I had happened to read that it's highly recommended to install upgrades first, including to this tool.
Finalizing setup.
Ready to log in!
It's alive!
Not so recent 14.04 LTS image... lots of updates.

Problems in the First Batch

Unfortunately the first batch of XPS 13:s with Ubuntu are going to ship with some problems. They're easy to fix if you know how to, but it's sad that they're there to begin with in the factory image. There is no knowledge when a fixed batch will start shipping - July maybe?

First of all, installing software upgrades stops. You need to run the following command via Dash → Terminal once: sudo apt-get install -f (it suggests upgrading libc-dev-bin, libc6-dbg, libc6-dev and udev). After that you can continue running Software Updater as usual, maybe rebooting in between.

Secondly, the fixed touchpad driver is included but not enabled by default. You need to enable the only non-enabled ”Additional Driver” as seen in the picture below or instructed in Youtube.

Dialog enabling the touchpad driver.

Clarification: you can safely ignore the two paragraphs below, they're just for advanced users like me who want to play with upgraded driver stacks.

Optionally, since I'm interested in the latest graphics drivers especially in case of a brand new hardware like Intel Broadwell, I upgraded my Ubuntu to use the 14.04.2 Hardware Enablement stack (matches 14.10 hardware support): sudo apt install --install-recommends libgles2-mesa-lts-utopic libglapi-mesa-lts-utopic linux-generic-lts-utopic xserver-xorg-lts-utopic libgl1-mesa-dri-lts-utopic libegl1-mesa-drivers-lts-utopic libgl1-mesa-glx-lts-utopic:i386
 
Even though it's much better than a normal Ubuntu 14.10 would be since many of the Dell fixes continue to be in use, some functionality might become worse compared to the pre-installed stack. The only thing I have noticed though is the internal microphone not working anymore out-of-the-box, requiring a kernel patch as mentioned in Dell's notes. This is not a surprise since the real eventual upstream support involves switching from HDA to I2S and during 14.10 kernel work that was not nearly done. If you're excited about new drivers, I'd recommend waiting until August when the 15.04 based 14.04.3 stack is available (same package names, but 'vivid' instead of 'utopic'). [edit: I couldn't resist myself when I saw linux-generic-lts-vivid (3.19 kernel) is already in the archives. 14.04.2 + that gives me working microphone again!] [edit 08/2015: full 14.04.3 HWE stack now available, improves graphics performance and features among else, everything seems good: sudo apt install --install-recommends linux-generic-lts-vivid libgles2-mesa-lts-vivid libglapi-mesa-lts-vivid xserver-xorg-lts-vivid libgl1-mesa-dri-lts-vivid libegl1-mesa-lts-vivid libgl1-mesa-glx-lts-vivid:i386 libegl1-mesa-lts-vivid libwayland-egl1-mesa-lts-vivid mesa-vdpau-drivers-lts-vivid libgl1-mesa-dri-lts-vivid:i386 ]

Conclusion

Dell XPS 13 Developer Edition with Ubuntu 14.04 LTS is an extremely capable laptop + OS combination nearing perfection, but not quite there because of the software problems in the launch pre-install image. The laptop looks great, feels like a quality product should and is very compact for the screen size.

I've moved over all my work onto it and everything so far is working smoothly in my day-to-day tasks. I'm staying at Ubuntu 14.04 LTS and using my previous LXC configuration to run the latest Ubuntu and Debian development versions. I've also done some interesting changes already like LUKS In-Place Conversion, converting the pre-installed Ubuntu into whole disk encrypted one (not recommended for the faint hearted, GRUB reconfiguration is a bit of a pain).

I look happily forward to working a few productive years with this one!

Wednesday, March 19, 2014

Qt 5.2.1 in Ubuntu

Ubuntu running Qt 5.2.1
Qt 5.2.1 landed in Ubuntu 14.04 LTS last Friday, hooray! Making it into a drop-in replacement for Qt 5.0.2 was not trivial. Because of the qreal change, it was decided to rebuild everything against the new Qt, so it was an all at once approach involving roughly 130 source packages while the parts were moving constantly. The landing last week meant pushing to archives around three thousand binary packages - counting all six architectures - with the total size of closer to 10 gigabytes.

The new Qt brings performance and features to base future work on, and is a solid base for the future of Ubuntu. You may be interested in the release notes for Qt 5.2.0 and 5.2.1. The Ubuntu SDK got updated to Qt Creator 3.0.1 + new Ubuntu plugin at the same time, although updates for the older Ubuntu releases is a work in progress by the SDK Team.

How We Got Here

Throughout the last few months before the last joint push, I filed tens of tagged bugs. For most of that time I was interested only in build and unit test results, since even tracking those was quite a task. I offered simple fixes here and there myself, if I found out a fix.

I created automated Launchpad recipe builds for over 80 packages that rely on Qt 5 in Ubuntu. Meanwhile I also kept on updating the Qt packaging for its 20+ source packages and tried to stay on top of Debian's and upstream's changes.

Parallel to this work, some like the Unity 8 and UI Toolkit developers started experimenting with my Qt 5.2 PPA. It turned out the rewritten QML engine in Qt 5.2 - V4 - was not entirely stable when 5.2.0 was released, so they worked together with upstream on fixes. It was only after 5.2.1 release that it could be said that V4 worked well enough for Unity 8. Known issues like these slowed down the start of full-blown testing.

Then everything built, unit tests passed, most integration tests passed and things seemed mostly to work. We had automated autopilot integration testing runs. The apps team tested through all of the app store to find out whether some needed fixes - most were fine without changes. On top of the found autopilot test failures and other app issues, manual testing found a few more bugs

Sudoku
Some critical pieces of software
like Sudoku needed small fixing
Finally last Thursday it was decided to push Qt in, with a belief that the remaining issues had fixes in branches or not blockers. It turned out the real deployment of Qt revealed a couple of more problems, and some new issues were raised to be blockers, and not all of the believed fixes were really fixing the bugs. So it was not a complete success. Considering the complexity of the landing, it was an adequate accomplishment however.

Specific Issues

Throughout this exercise I bumped into more obstacles that I can remember, but those included:
  • Not all of the packages had seen updates for months or for example since last summer, and since I needed to rebuild everything I found out various problems that were not related to Qt 5.2
  • Unrelated changes during 14.04 development broke packages - like one wouldn't immediately think a gtkdoc update would break a package using Qt
  • Syncing packaging with Debian is GOOD, and the fixes from Debian were likewise excellent and needed, but some changes there had effects on our wide-spread Qt 5 usage, like the mkspecs directory move
  • xvfb used to run unit tests needed parameters updated in most packages because of OpenGL changes in Qt
  • arm64 and ppc64el were late to be added to the landing PPA. Fixing those archs up was quite a last minute effort and needed to continue after landing by the porters. On the plus side, with Qt 5.2's V4 working on those archs unlike Qt 5.0's V8 based Qt Declarative, a majority of Unity 8 dependencies are now already available for 64-bit ARM and PowerPC!
  • While Qt was being prepared the 100 other packages kept on changing, and I needed to keep on top of all of it, especially during the final landing phase that lasted for two weeks. During it, there was no total control of "locking" packages into Qt 5.2 transition, so for the 20+ manual uploads I simply needed to keep track of whether something changed in the distribution and accommodate.
One issue related to the last one was that some things needed were in progress at the time. There was no support for automated AP test running using a PPA. There was also no support on building images. If migration to Ubuntu Touch landing process (CI Train, a middle point on the way to CI Airlines) had been completed for all the packages earlier, handling the locking would have been clearer, and the "trunk passes all integration tests too" would have prevented "trunk seemingly got broken" situations I ended up since I was using bzr trunks everywhere.

Qt 5.3?

We are near to having a promoted Ubuntu image for the mobile users using Qt 5.2, if no new issues pop up. Ubuntu 14.04 LTS will be released in a month to the joy of desktop and mobile users alike.

It was discussed during the vUDS that Qt 5.3.x would be likely Qt version for the next cycle, to be on the more conservative side this time. It's not entirely wrong to say we should have migrated to Qt 5.1 in the beginning of this cycle and only consider 5.2. With 5.0 in use with known issues, we almost had to switch to 5.2.

Kubuntu will join the Qt 5 users next cycle, so it's no longer only Ubuntu deciding the version of Qt. Hopefully there can be a joint agreement, but in the worst case Ubuntu will need a separate Qt version packaged.

Wednesday, November 27, 2013

Jolla launch party

And then for something completely different, I've my hands on Jolla now, and it's beautiful!


A quick dmesg of course is among first things to do...
[    0.000000] Booting Linux on physical CPU 0
[    0.000000] Initializing cgroup subsys cpu
[    0.000000] Linux version 3.4.0.20131115.2 (abuild@es-17-21) (gcc version 4.6.4 20130412 (Mer 4.6.4-1) (Linaro GCC 4.6-2013.05) ) #1 SMP PREEMPT Mon Nov 18 03:00:49 UTC 2013
[    0.000000] CPU: ARMv7 Processor [511f04d4] revision 4 (ARMv7), cr=10c5387d
[    0.000000] CPU: PIPT / VIPT nonaliasing data cache, PIPT instruction cache
[    0.000000] Machine: QCT MSM8930 CDP
... click for the complete file ...
And what it has eaten: Qt 5.1!
...
qt5-qtconcurrent-5.1.0+git27-1.9.4.armv7hl
qt5-qtcore-5.1.0+git27-1.9.4.armv7hl
qt5-qtdbus-5.1.0+git27-1.9.4.armv7hl
qt5-qtdeclarative-5.1.0+git24-1.10.2.armv7hl
... click for the complete file ...
It was a very nice launch party, thanks to everyone involved.


Update: a few more at my Google+ Jolla launch party gallery

Workaround for setting Full RGB when Intel driver's Automatic setting does not work

Background

I upgraded from Linux 3.8 to 3.11 among with newer Mesa, X.Org and Intel driver recently and I found a small workaround was needed because of upstream changes.

The upstream change was the Add "Automatic" mode for "Broadcast RGB" property, and defaulting to the Automatic. This is a sensible default, since many (most?) TVs default to the more limited 16-235, and continuing to default to Full from the driver side would mean wrong colors on the TV. I've set my screen to support the full 0-255 range available to not cut the amount of available shades of colors down.

Unfortunately it seems the Automatic setting does not work for my HDMI input, ie blacks become grey since the driver still outputs the more limited range. Maybe there could be something to improve on the driver side, but I'd guess it's more about my 2008 Sony TV actually having a mode that the standard suggests limited range for. I remember the TV did default to limited range, so maybe the EDID data from TV does not change when setting the RGB range to Full.

I hope the Automatic setting works to offer full range on newer screens and the modes they have, but that's probably up to the manufacturers and standards.

Below is an illustration of the correct setting on my Haswell CPU. When the Broadcast RGB is left to its default Automatic setting, the above image is displayed. When set to Full, the image below with deeper blacks is seen instead. I used manual settings on my camera so it's the same exposure.


Workaround

For me the workaround has evolved to the following so far. Create a /etc/X11/Xsession.d/95fullrgb file:
 
if [ "$(/usr/bin/xrandr -q --prop | grep 'Broadcast RGB: Full' | wc -l)" = "0" ] ; then
/usr/bin/xrandr --output HDMI3 --set "Broadcast RGB" "Full"
fi
And since I'm using lightdm, adding the following to /etc/lightdm/lightdm.conf means the flicker only happens once during bootup:

display-setup-script=/etc/X11/Xsession.d/95fullrgb

Important: when using the LightDM setting, enable executable bits (chmod +x) to /etc/X11/Xsession.d/95fullrgb for it to work. Obviously also check your output, for me it was HDMI3.

If there is no situation where it'd set back to "Limited 16:235" setting on its own, the display manager script should be enough and having it in /etc/X11/Xsession.d is redundant and slows login time down. I think for me it maybe went from 2 seconds to 3 seconds since executing xrandr query is not cheap.

Misc

Note that unrelated to Full range usage, the Limited range at the moment behaves incorrectly on Haswell until the patch in bug #71769 is accepted. That means, the blacks are grey in Limited mode even if the screen is also set to Limited.

I'd prefer there would be a kernel parameter for the Broadcast RGB setting, although my Haswell machine does boot so fast I don't get to see too many seconds of wrong colors...

Wednesday, July 10, 2013

Latest Compiz gaming update to the Ubuntu 12.04 LTS

A new Compiz window manager performance update reached Ubuntu 12.04 LTS users last week. This completes the earlier [1] [2] enabling of 'unredirected' (compositing disabled) fullscreen gaming and other applications for performance benefits.

The update has two fixes. The first one fixes a compiz CPU usage regression. The second one enables unredirection also for Intel and Nouveau users using the Mesa 9.0.x stack. That means up-to-date installs from 12.04.2 LTS installation media and anyone with original 12.04 LTS installation who has opted in to the 'quantal' package updates of the kernel, X.Org and mesa *)

The new default setting for the unredirection blacklist is shown in the image below (CompizConfig Settings Manager -> General -> OpenGL). It now only blacklists the original Mesa 8.0.x series for nouveau and intel, plus the '9.0' (not a point release).


I did new runs of OpenArena at openbenchmarking.org from a 12.04.2 LTS live USB. For comparison I first had a run with the non-updated Mesa 9.0 from February. I then allowed Ubuntu to upgrade the Mesa to the current 9.0.3, and ran the test with both the previous version of Compiz and the new one released.

12.04.2 LTS    Mesa 9.0   | Mesa 9.0.3 | Mesa 9.0.3
               old Compiz | old Compiz | new Compiz
OpenArena fps    29.63    |   31.90    | 35.03     

Reading into the results, Mesa 9.0.3 seems to have improved the slowdown in the redirected case. That would include normal desktop usage as well. Meanwhile the unredirected performance remains about 10% higher.

*) Packages linux-generic-lts-quantal xserver-xorg-lts-quantal libgl1-mesa-dri-lts-quantal libegl1-mesa-drivers-lts-quantal. 'raring' stack with Mesa 9.1 and kernel 3.8 will be available around the time of 12.04.3 LTS installation media late August.

Tuesday, May 21, 2013

Network from laptop to Android device over USB

If you're running an Android device with GNU userland Linux in a chroot and need a full network access over USB cable (so that you can use your laptop/desktop machine's network connection from the device), here's a quick primer on how it can be set up.

When doing Openmoko hacking, one always first plugged in the USB cable and forwarded network, or like I did later forwarded network over Bluetooth. It was mostly because the WiFi was quite unstable with many of the kernels.

I recently found out myself using a chroot on a Nexus 4 without working WiFi, so instead of my usual WiFi usage I needed network over USB... trivial, of course, except that there's Android on the way and I'm a Android newbie. Thanks to ZDmitry on Freenode, I got the bits for the Android part so I got it working.

On device, have eg. data/usb.sh with the following contents.
#!/system/xbin/sh
CHROOT="/data/chroot"

ip addr add 192.168.137.2/30 dev usb0
ip link set usb0 up
ip route delete default
ip route add default via 192.168.137.1;
setprop net.dns1 8.8.8.8
echo 'nameserver 8.8.8.8' >> $CHROOT/run/resolvconf/resolv.conf
On the host, execute the following:
adb shell setprop sys.usb.config rndis,adb
adb shell data/usb.sh
sudo ifconfig usb0 192.168.137.1
sudo iptables -A POSTROUTING -t nat -j MASQUERADE -s 192.168.137.0/24
echo 1 | sudo tee /proc/sys/net/ipv4/ip_forward 
sudo iptables -P FORWARD ACCEPT
This works at least with Ubuntu saucy chroot. The main difference in some other distro might be whether the resolv.conf has moved to /run or not. You should be now all set up to browse / apt-get stuff from the device again.

Update: Clarified that this is to forward the desktop/laptop's network connection to the device so that network is accessible from the device over USB.
Update2, 09/2013: It's also possible to get working on the newer flipped images. Remove the "$CHROOT" from nameserver echoing and it should be fine. With small testing it got somehow reset after a while at which point another run of data/usb.sh on the device restored connection.

Tuesday, May 07, 2013

Qt 5 in Debian and Ubuntu, patches upstreaming

Packages

I quite like the current status of Qt 5 in Debian and Ubuntu (the links are to the qtbase packages, there are ca. 15 other modules as well). Despite Qt 5 being bleeding edge and Ubuntu having had the need to use it before even the first stable release came out in December, the co-operation with Debian has gone well. Debian is now having the first Qt 5 uploads done to experimental and later on to unstable. My work contributed to pkg-kde git on the modules has been welcomed, and even though more work has been done there by others, there haven't been drastic changes that would cause too big transition problems on the Ubuntu side. It has of course helped to ask others what they want, like the whole usage of qtchooser. Now with Qt 5.0.2 I've been able to mostly re-sync all newer changes / fixes to my packaging from Debian to Ubuntu and vice versa.

There will remain some delta, as pkg-kde plans to ask for a complete transition to qtchooser so that all Qt using packages would declare the Qt version either by QT_SELECT environment variable (preferable) or a package dependency (qt5-default or qt4-default). As a temporary change related to that, Debian will have a debhelper modification that defaults QT_SELECT to qt4 for the duration of the transition. Meanwhile, Ubuntu already shipped the 13.04 release with Qt 5, and a shortcut was taken there instead to prevent any Qt 4 package breakage. However, after the transition period in Debian is over, that small delta can again be removed.

I will also need to continue pushing any useful packaging I do to Debian. I pushed qtimageformats and qtdoc last week, but I know I'm still behind with some "possibly interesting" git snapshot modules like qtsensors and qtpim.

Patches

More delta exists in the form of multiple patches related to the recent Ubuntu Touch efforts. I do not think they are of immediate interest to Debian – let's start packaging Qt 5 apps to Debian first. However, about all of those patches have already been upstreamed to be part of Qt 5.1 or Qt 5.2, or will be later on. Some already were for 5.0.2.

A couple of months ago Ubuntu did have some patches hanging around with no clear author information. This was a result of the heated preparation for the Ubuntu Touch launches, and the fact that patches flew (too) quickly in place into various PPA:s. I started hunting down the authors, and the situation turned out to be better than I thought. About half of the patches were already upstreamed, and work on properly upstreaming the other ones was swiftly started after my initial contact. Proper DEP3 fields do help understanding the overall situation. There are now 10 Canonical individuals in the upstream group of contributors, and in the last week's sprint it turned out more people will be joining them to upstream their future patches.

Nowadays about all the requests I get for including patches from developers are stuff that was already upstreamed, like the XEmbed support in qtbase. This is how it should be.

One big patch still being Ubuntu only is the Unity appmenu support. There was a temporary solution for 13.04 that forward-ported the Qt 4 way of doing it. This will be however removed from the first 13.10 ('saucy') upload, as it's not upstreamable (the old way of supporting Unity appmenus was deliberately dropped from Qt 5). A re-implementation via QPA plugin support is on its way, but it may be that the development version users will be without appmenu support for some duration. Another big patch is related to qtwebkit's device pixel ratio, which will need to be fixed. Apart from these two areas of work that need to be followed through, patches situation is quite nice as mentioned.

Conclusion

Free software will do world domination, and I'm happy to be part of it.